2026 How to Install a Faucet Step by Step?

Time:2026-10-19 Author:Ethan
0%

Installing a faucet looks simple until a hidden leak stains the cabinet below. This 2026 guide explains how to install a faucet safely, clearly, and with fewer surprises. It covers tools, supply lines, mounting hardware, sealing, testing, and common mistakes. The goal is not merely a polished handle. It is a dry, stable, long-lasting connection.

Richard Trethewey, a respected plumbing expert known for This Old House, says, “The most important part of any plumbing repair is understanding what you’re working with before you begin.” That principle fits the question, “What is the best way to install a faucet?” Check the sink openings, faucet type, shutoff valves, and manufacturer’s instructions before touching a wrench. Measure twice. Work slowly.

You will see practical details, such as placing a towel beneath the valves and tightening connections by hand before using a wrench. Small steps matter. Do not overtighten. It can damage threads or crush a gasket. A careful installer also turns the water on gradually, checks every joint with a dry tissue, and watches for slow drops. Still, no guide replaces judgment. Older valves may fail when moved, and some sink designs require an adapter. If a connection feels uncertain, pause and seek qualified plumbing help. A slightly imperfect installation can be corrected early. A hidden leak can become expensive. This article keeps the process realistic, evidence-based, and focused on reliable results.
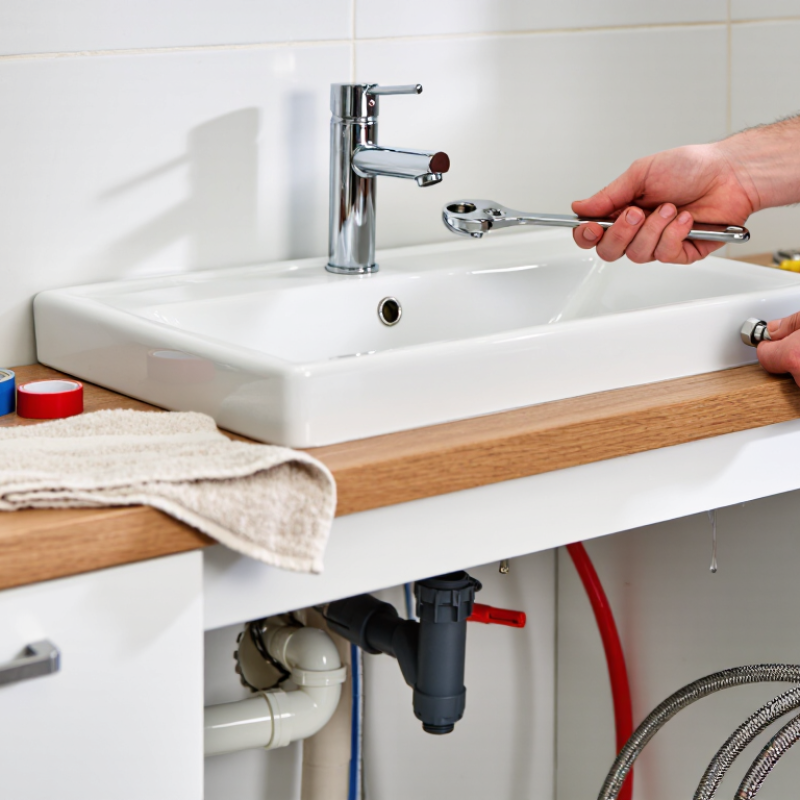
2026 How to Install a Faucet Step by Step?

Tools, Materials, and Safety Checks for Faucet Installation

2026 How to Install a Faucet Step by Step?

Prepare the tools before touching the old faucet. You will need an adjustable wrench, basin wrench, screwdriver, bucket, flashlight, clean cloth, and a small towel. Keep replacement supply lines, mounting hardware, and the manufacturer’s gasket nearby. Turn off both shutoff valves, then open the faucet to release pressure. Place the bucket below the connections. Water may still remain inside the pipes.

Remove the old supply lines and mounting nuts carefully. Corroded fittings can twist the valve, so stop if the valve moves. Clean the sink surface until it feels smooth and dry. Set the new gasket correctly, guide the faucet through the opening, and tighten the mounting hardware from below. Keep the faucet aligned before final tightening. Connect the hot and cold lines to their matching valves. Avoid excessive force. Overtightening can damage threads or crush a gasket.

Tips: Use two wrenches when tightening supply connections. This protects the shutoff valve. Turn the water on slowly. Check every joint with a dry tissue, not only your fingers. Watch for drops for several minutes. Test the handle, spray function, and drain area. I once overlooked a slightly loose connection because the first check looked dry. Recheck after the water warms. If a valve is cracked, badly corroded, or difficult to close, pause the installation and contact a qualified plumbing professional.

Shut Off the Water and Remove the Existing Faucet

Shut Off the Water and Remove the Existing Faucet

Before installing a new faucet, prepare the sink area carefully. Clear bottles, sponges, and cleaning supplies from the cabinet. Place a shallow bucket beneath the water connections. Keep an old towel nearby because trapped water usually appears.

Turn the shutoff valves clockwise until they stop. Do not force them. Open the faucet handles afterward to release pressure from the supply lines. Check that no water flows. I once skipped this check, and a small stream quickly soaked the cabinet floor. It was a simple mistake, but an avoidable one. If the valves feel frozen, leak, or fail to stop the water, contact a qualified plumber instead of applying excessive force.

Use an adjustable wrench to loosen the supply-line nuts. Support the valve connection with your other hand. This reduces stress on older pipes. Remove the mounting nuts beneath the sink, then lift the existing faucet from above. A putty knife can help separate a stuck base, but work gently around the sink surface. Scrape away old sealant and wipe the mounting area completely. Inspect the pipes and connections for corrosion before continuing.

Tips: Take a photo before disconnecting anything. Label hot and cold lines if they look identical. Wear gloves, but keep your grip precise. Do not rush the final connection check. Even a dry-looking joint may drip after several minutes.

Prepare the Sink and Position the New Faucet

Prepare the Sink and Position the New Faucet

Before touching the new faucet, clear the cabinet and place a towel beneath the connections. Close both shutoff valves, then open the old faucet to release trapped pressure. Disconnect the supply lines slowly; some water usually remains. Remove the mounting hardware and lift the old assembly straight up. Scrape away old sealant without scoring the sink surface. Clean the mounting area with a non-abrasive cloth. Inspect the holes for cracks, rust, or uneven edges. These small defects can create leaks that resemble loose connections.

Set the new gasket over the sink opening, following the installation sheet. Some faucets need a deck plate; others fit one, two, or three holes. Center the spout over the drain, then check handle clearance near the wall or backsplash. Finger-tighten the mounting nuts first. Then tighten them evenly underneath. Do not crush the gasket. According to the U.S. EPA WaterSense specification, certified bathroom faucets use no more than 1.5 gallons per minute, compared with the federal 2.2-gpm standard. EPA also reports that faucets contribute to more than one trillion gallons of annual water use in the United States. Kitchen faucets follow different requirements, so verify the rated flow.

Tips: Photograph valve positions before removal. Keep old washers nearby. After positioning, pause and look from above. A slight offset is easy to miss. I sometimes want to tighten everything immediately, but that can hide a crooked gasket. Wipe each joint dry, restore water slowly, and watch for three minutes. A dry first check is not proof.

2026 How to Install a Faucet Step by Step? – Prepare the Sink and Position the New Faucet
Step Installation Stage Required Tools or Materials Key Measurements and Data Procedure Completion Check
1 Shut Off the Water Supply Adjustable wrench, bucket, cloth 0 water pressure Close both shutoff valves beneath the sink by turning them clockwise. Open the existing faucet to release pressure and place a bucket below the connections. Water stops flowing from both supply lines before disconnection begins.
2 Remove the Existing Faucet Adjustable wrench or basin wrench, penetrating lubricant if needed Allow 10–20 minutes Disconnect the hot and cold supply lines. Loosen the mounting nuts beneath the sink, lift out the old faucet, and remove any attached gasket or hardware. All old hardware is removed without damaging the sink or supply valves.
3 Clean the Sink Surface Plastic scraper, non-abrasive cleaner, clean cloth Clean area: 100% of faucet base Scrape away old plumber’s putty, silicone, mineral deposits, and grime around the faucet openings. Wipe the surface completely dry. The sink deck is smooth, dry, and free of debris that could prevent a watertight seal.
4 Confirm Sink and Faucet Compatibility Tape measure, flashlight, installation instructions Common hole spacing: 4 in or 8 in Count the sink holes and measure the center-to-center spacing. Verify that the faucet configuration matches the sink and that the mounting area is accessible below. The number, spacing, and diameter of the sink holes match the new faucet assembly.
5 Install the Deck Plate or Gasket Deck plate if required, rubber gasket, plumber’s putty or approved sealant Gasket must cover the full base Position the gasket or deck plate over the sink openings. Use sealant only where permitted by the faucet instructions, avoiding excess material around the opening. The gasket lies flat, remains centered, and creates continuous contact with the sink surface.
6 Position the New Faucet New faucet assembly, clean cloth Spout centered within approximately 3 mm Feed the supply tubes and mounting shank through the sink opening. Place the faucet on the gasket or deck plate and align the spout with the center of the basin. The faucet base sits level and the spout points directly toward the drain.
7 Secure the Faucet Beneath the Sink Mounting washer, mounting nut, basin wrench or suitable wrench Hand-tight, then about 1/4 turn Install the washer and mounting nut from below. Hold the faucet in position while tightening the nut gradually to prevent the body from twisting. The faucet does not rotate when gently moved, and the sink surface is not cracked or distorted.
8 Connect the Supply Lines Flexible supply lines, adjustable wrench Avoid cross-threading; do not overtighten Connect the hot and cold lines to the corresponding shutoff valves. Tighten threaded connections by hand first, then make a small additional turn with a wrench. Hot and cold connections are correctly matched, aligned, and firmly attached.
9 Flush the Supply Lines Bucket or container, cloth Flush for 30–60 seconds Remove the faucet aerator if accessible. Slowly open both shutoff valves and let water run into a container to clear sediment from the lines. Water flows steadily and visible debris has been removed before the aerator is replaced.
10 Inspect for Leaks Dry paper towel, flashlight Check for 2–5 minutes Run hot and cold water separately, then together. Dry each connection with a paper towel and inspect the faucet base, mounting area, and supply valves. No moisture appears at any connection after repeated water flow.
11 Reinstall the Aerator and Clean Up Aerator, soft cloth, mild cleaner Final flow: steady, splash-free stream Replace the aerator, wipe the faucet and sink, remove tools, and check that cabinet contents will not press against the supply lines. The faucet operates smoothly, the water stream is even, and all connections remain dry.

Connect the Water Supply Lines and Secure the Faucet

2026 How to Install a Faucet Step by Step?

After removing the old faucet, close both shutoff valves and open the handle to release pressure. Wipe the sink deck completely. A dry surface helps the rubber gasket seal evenly. Feed the faucet through the mounting hole, then fit the gasket and mounting plate underneath. Hand-tighten the retaining nut first. Align the spout with the sink center before using a basin wrench. Do not overtighten. Porcelain and thin metal can crack or deform.

Connect the hot and cold supply lines to the matching faucet inlets. Keep each line gently curved, never sharply bent behind the cabinet. Tighten the fittings by hand, then add a small wrench turn according to the fitting instructions. Hold the faucet above the sink while tightening below. It should feel firm, not forced. The U.S. Environmental Protection Agency reports that household leaks can waste nearly 10,000 gallons annually, so a slow connection leak deserves attention.

Tips: Place a dry paper towel under every joint. Open each shutoff valve slowly and inspect for moisture for several minutes. I often recheck the connections after the first use; rushing this step is an easy mistake. If the faucet moves, drain the cabinet, realign the body, and tighten the mounting hardware again. EPA WaterSense specifications limit bathroom faucet flow to 1.5 gallons per minute, helping reduce water use without requiring higher supply pressure. Source: U.S. EPA WaterSense, Residential Bathroom Faucets Specification.

Test the Installation and Fix Common Leaks

After installing the faucet, keep the cabinet area clear and place a dry towel beneath every connection. Open the shutoff valves slowly, then watch the joints for at least two minutes. Turn on both hot and cold handles. Check the water stream, handle movement, and drain area. A flashlight helps reveal small drops under the sink.

Run the faucet at full pressure for one minute. Then close it and inspect the supply lines, mounting nut, and valve connections again. If water appears at a threaded joint, shut off the valves before making adjustments. Tighten the connection gently with a wrench, but avoid forcing it. Excessive pressure can damage threads or crush a sealing washer. I once overtightened a plastic nut and created a leak that was harder to fix.

A leak near the faucet base may indicate a misplaced gasket or an uneven mounting surface. Remove the faucet, clean away old residue, and reseat the gasket carefully. If the leak comes from a flexible hose, replace the washer or the hose when it shows cracks, swelling, or corrosion. Dry the area completely and test again after ten minutes. Do not rely on a dry towel alone. Touch each joint with a clean tissue; even a tiny wet mark deserves attention. If the leak continues, stop using the fixture and consult a licensed plumbing professional.

2026 Faucet Installation: Leak-Test Checkpoints

Use these practical observation intervals after installation to test the supply connections, faucet base, sprayer hose, and shut-off valves. Inspect the underside of the sink during every checkpoint.

If moisture appears, turn off the water, dry the connection, and identify the source. Hand-tighten first, then make a small additional adjustment only when necessary. Replace a damaged washer or O-ring instead of overtightening the fitting.

FAQS

What should I do before removing an existing faucet?

Clear the cabinet and sink area. Place a shallow bucket below the connections. Keep an old towel nearby.

How can I shut off the water safely?

Turn both shutoff valves clockwise until they stop. Do not force them. Open the faucet handles to release pressure.

How do I know the water is fully off?

Open both handles and watch the stream. No water should flow. Check carefully.

What tools help remove the old faucet?

Use an adjustable wrench and, if needed, a basin wrench. A putty knife can separate a stuck base gently.

How should I prepare the sink before installing the new faucet?

Remove old sealant and wipe the mounting area completely. The surface must be dry and clean.

How do I connect the water supply lines?

Match the hot and cold lines with the correct faucet inlets. Keep each line gently curved, not sharply bent.

How tight should the faucet connections be?

Hand-tighten each fitting first. Add a small wrench turn. Firm is enough. Do not overtighten.

How can I check for leaks after installation?

Place dry paper towels under every joint. Open the valves slowly and watch for moisture for several minutes.

What should I do if a connection leaks?

Shut off the valves before adjusting it. Tighten gently and inspect the washer. I once tightened too much and made things worse.

When should I call a plumbing professional?

Call one if valves are frozen, pipes show serious corrosion, or leaks continue after careful adjustment. Stop using the faucet first.

Conclusion

Installing a faucet successfully starts with careful preparation. Gather the necessary tools and materials, including an adjustable wrench, screwdrivers, plumber’s tape, a basin wrench, and a cloth. Before beginning, clear the workspace and check that the water supply is safely accessible. Shut off both water valves, open the existing faucet to release pressure, and disconnect the supply lines. Remove the mounting hardware underneath the sink, lift out the old faucet, and clean away any residue around the faucet opening.

What is the best way to install a faucet? Position the new faucet evenly on the sink, place any required gasket or seal, and tighten the mounting hardware from below without over-tightening. Connect the hot and cold supply lines to the correct valves, using plumber’s tape where appropriate. Turn the water on slowly, inspect every connection for leaks, and run the faucet briefly to flush debris. If a leak appears, gently tighten the fitting or reseat the seal, then test again.

Ethan

Ethan

Ethan is a seasoned marketing professional with a deep expertise in our company's innovative product line. With a passion for sharing knowledge and insights, he takes the lead in regularly updating our corporate blog, where he explores industry trends, product features, and effective marketing......