7 Tips to Repair a Broken Faucet Without Tools?

Time:2026-09-29 Author:Liam
0%

A broken faucet can turn a quiet kitchen into a small, steady disaster. Water may drip from the spout, spray around the handle, or pool beneath the sink. Before reaching for a wrench, many homeowners ask, “How to repair a broken faucet without tools?” In some cases, a careful hand, a cloth, and household materials can reduce the leak temporarily.

This guide focuses on practical, low-risk methods based on common faucet problems. You may tighten a loose connection by hand, reposition a displaced washer, or use a clean rubber band for extra grip. A folded cloth can protect your fingers and improve control around slippery parts. Small details matter. Turn off the water supply first, even when the leak looks minor. Then open the faucet briefly to release pressure.

Do not force stuck components. That can crack plastic threads or worsen a hidden leak. A temporary repair is not the same as a professional fix. If water reaches electrical outlets, the cabinet swells, or the faucet body is cracked, stop and contact a qualified plumber. That judgment is important, and it is easy to underestimate damage under a sink. I have found that rushed repairs often create a second problem, especially when parts are reassembled in the wrong order. These seven tips explain what you can safely try without tools, what signs require expert help, and when replacing the faucet makes more sense than improvising. Expect simple steps, realistic limits, and a little patience.
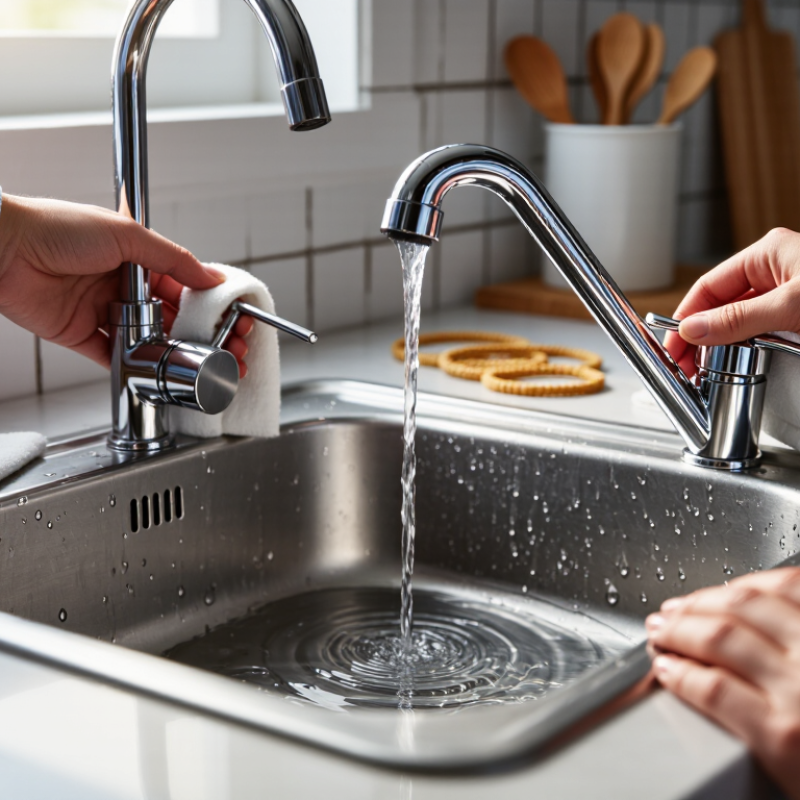
7 Tips to Repair a Broken Faucet Without Tools?

Identify the Faucet Type and Locate the Leak

Before repairing a faucet without tools, identify its design and the exact leak point. A compression faucet usually has two separate handles that tighten down. Cartridge, ball, and ceramic-disk faucets often use one handle. The shape gives clues, but it can mislead you. I have mistaken a cartridge faucet for a ball faucet before.

Tip 1: Dry the faucet completely with a cloth. Then turn the water on slowly and watch the first wet spot. Water dripping from the spout usually means an internal seal is worn. A leak around the handle may indicate a damaged cartridge or loose packing. Water pooling at the base often points to a worn O-ring. Look closely.

Tip 2: Check the connections beneath the sink by hand. A damp supply line connection can cause steady dripping, while water inside the cabinet may travel from another point. Place a dry tissue under each connection. It reveals small leaks quickly. Do not force stuck parts with household objects. That can damage threads or crack plastic fittings. If the leak comes from inside the wall, stop using the faucet and arrange qualified plumbing help. My first inspection once missed water running along the underside, so checking from several angles matters.

Stop the Water Flow Using Hand-Operated Shutoff Valves

A dripping faucet needs control before repair. Hand-operated shutoff valves are the safest tool-free starting point. Look beneath the sink for small valves on the hot and cold supply lines. Clear the cabinet first. You need room to turn them. Turn each handle clockwise, slowly and firmly. Quarter-turn handles usually close when the lever sits across the pipe. Round handles need several turns. Do not force a stiff valve. It may break and release more water. Open the faucet briefly. A weak stream means pressure is falling. No flow confirms isolation.

Use a towel under the connection. It catches hidden water and improves your grip. Check the faucet again after one minute. If water continues, close the home’s main shutoff valve, if accessible. The U.S. Environmental Protection Agency’s WaterSense program reports that household leaks can waste nearly 10,000 gallons yearly. It also reports that 10% of homes have leaks wasting more than 90 gallons daily. That makes quick isolation practical, not cosmetic. I once assumed a closed handle meant a sealed line. It did not. Old valves can pass water internally. Do not remove the faucet while pressure remains. Replace only simple hand-tight parts if the repair guidance allows it. Stop if the valve spins freely, the pipe moves, or water sprays. Local plumbing conditions vary. A licensed professional should handle damaged shutoff valves or concealed leaks.

Try Hand-Tightening Loose Faucet Components

7 Tips to Repair a Broken Faucet Without Tools

Try Hand-Tightening Loose Faucet Components

A dripping faucet often has a loose handle, cap, or connection. In many cases, your hands can restore a proper seal. I have fixed minor leaks this way, but I also learned not to force stubborn parts. Start by drying the faucet completely. Then turn off the water supply beneath the sink, if accessible. This prevents a small mistake from becoming a larger leak.

Tip: Check the handle first. Hold its base firmly and rotate the loose section clockwise by hand. Use a dry cloth for better grip. Tighten slowly until the movement stops, then add only a gentle quarter-turn. More pressure can damage plastic threads or crush a rubber washer. That mistake is easy to make.

Tip: Inspect the decorative cap and spout collar. These components can loosen through daily use, especially when the faucet moves during cleaning. Hand-tighten them until they sit evenly. Do not twist a part that feels stuck. It may be cross-threaded, cracked, or secured by a hidden fastener.

After tightening, reopen the water supply gradually. Watch the joint for one full minute. Feel underneath with a dry fingertip. If moisture returns, the internal washer may be worn, or the fitting may be damaged. I sometimes expect a quick fix and overlook that detail. Stop there and seek qualified plumbing help rather than forcing the connection.

7 Tips to Repair a Broken Faucet Without Tools? — Try Hand-Tightening Loose Faucet Components

Tip Component to Check Hand-Tightening Method When It May Help Caution
1 Removable aerator Grip the aerator at the faucet spout and turn it clockwise gently, if it is designed to be tightened by hand. A loose aerator can cause water to spray unevenly or leak around the spout tip. Some aerators are recessed or require a dedicated key. Do not force a smooth or stuck fitting.
2 Spray-head connection Unscrew the pull-down spray head by hand, check that it sits squarely on the hose, then reconnect it and turn it clockwise until snug. A loose connection may drip where the spray head meets the hose. Stop if the hose twists or the connection will not thread easily; cross-threading can damage it.
3 Hand-tightened hose coupling If the coupling is accessible and intended for hand tightening, hold the hose steady and turn the coupling clockwise until snug. May help with a drip at an accessible, loose hose connection. Turn off the faucet first. Many under-sink connections need a wrench and should not be forced by hand.
4 Decorative handle cap Press or twist a loose, hand-fit cap back into its original position without applying excessive pressure. Can secure a cap that has simply loosened or shifted. A handle that wobbles underneath may be held by a screw, which cannot usually be tightened without a tool.
5 Threaded spout collar If the collar is designed to turn by hand, align it carefully and turn it clockwise until it is snug. May reduce movement at a spout base when the collar itself has loosened. Not all faucets have a hand-tightenable collar. Do not twist the spout or use excessive force.
6 Loose parts after cleaning Reassemble removable parts in their original order and hand-tighten threaded pieces gently. Useful if an aerator or spray head was removed for cleaning and now feels loose. Keep seals and washers in place; a missing or damaged seal can continue to leak even when the fitting is tight.
7 Connection check after tightening Turn the water on slowly and check the repaired area with a dry tissue or cloth for fresh moisture. Confirms whether a hand-tightened connection has stopped the leak. If leaking continues, shut off the water and seek a suitable replacement seal or professional repair rather than tightening harder.

Safety note: Hand-tightening is suitable only for fittings designed to be tightened by hand. A damaged cartridge, worn seal, cracked part, or connection that requires a tool cannot reliably be repaired by force.

Clear Accessible Debris From the Aerator by Hand

A weak stream does not always mean the faucet is broken. Often, mineral flakes, sand, or old pipe debris block the small aerator screen. Turn the handle off and wait until the water stops dripping. Dry the aerator with a clean cloth. This improves your grip and keeps loose dirt from falling into the sink.

Try turning the aerator counterclockwise with your fingers. Use gentle, even pressure. Do not squeeze it tightly, because a cracked plastic edge can make removal harder. Once loose, place the part in your palm and inspect the screen. Pinch away visible debris with your fingertips. Then rinse the aerator under clean running water and rub the mesh carefully. A soft toothbrush can help, but that is no longer a tool-free repair.

I once rushed this step and pushed grit deeper into the screen. The flow became worse. A slower touch works better. Check the rubber washer before replacing the aerator. If it looks twisted, flatten it with your finger. Screw the aerator back by hand until snug, then test the stream. Stop if the threads feel rough or the part will not turn. Some aerators are fitted tightly and require a matching removal key. Forcing them by hand may damage the faucet finish or housing.

7 Tips to Repair a Broken Faucet Without Tools: Clear Accessible Debris From the Aerator by Hand

Faucet aerators are commonly labeled with flow rates ranging from 0.5 to 2.2 gallons per minute. If water flow suddenly drops, unscrew the aerator by hand when possible, remove visible sediment or debris, rinse the screen, and reinstall it. The chart shows common labeled flow-rate options used for household faucets in the United States.

Check for Leaks and Recognize When Tools Are Necessary

7 Tips to Repair a Broken Faucet Without Tools

Tip 1: Dry the faucet and surrounding counter completely. Place a folded towel beneath the pipes. Watch for fresh drops for five minutes. Tip 2: Check the handle, spout, and base separately. Water near the handle may indicate a worn internal seal. Water at the base can come from a loose connection. Tip 3: Close the small shutoff valves by hand. Turn them clockwise gently. Do not force them. Older valves can break unexpectedly.

Tip 4: Test the faucet again after cleaning the aerator screen by hand. Sediment may cause a weak stream, but it rarely fixes a true leak. Tip 5: Press a dry tissue around each joint. A wet mark reveals the leak’s exact path. This simple test prevents guesswork. Tip 6: If water continues flowing after the shutoff valve closes, stop using the faucet. The valve may be defective. A main water shutoff may be necessary, and professional help is safer.

Tip 7: Recognize when tools are necessary. Replacing a cartridge, tightening a hidden nut, or removing a corroded aerator usually requires proper tools. Improvised objects can damage threads and create a larger leak. I have seen small repairs become costly after too much hand force. That mistake is easy to make. If water reaches electrical outlets, cabinets, or flooring, keep the area dry and arrange qualified plumbing assistance promptly.

FAQS

Can I stop a minor faucet leak by hand?

Sometimes. Dry the faucet and turn off the accessible supply valve beneath the sink. Gently tighten a loose handle or collar until snug. A small quarter-turn may be enough.

How can I tell whether the hand-tightening worked?

Reopen the water slowly and watch the joint for one minute. Check underneath with a dry fingertip. If moisture returns, the washer or fitting may be damaged.

What can cause a weak stream?

Sediment or mineral flakes may block the aerator screen. Remove it gently by hand, rinse it under clean water, and pinch away visible debris. Not every weak stream has this cause.

What if the aerator will not turn?

Stop if it feels stuck or the threads feel rough. Forcing it can crack plastic or scratch the faucet finish. Some aerators need a matching removal key.

How can I find the exact leak location?

Dry the faucet and counter, then place a folded towel beneath the pipes. Press dry tissue around each joint. A fresh wet mark can show where water escapes.

What might water near the handle or base mean?

Water near the handle may point to a worn internal seal. A wet base can suggest a loose connection. These clues help, but they are not a diagnosis.

Should I turn off a stiff shutoff valve?

Turn it clockwise gently, and stop if it resists. Older valves can break. If water keeps flowing after the valve closes, stop using the faucet and seek plumbing help.

When is professional help safer?

Hidden nuts, cartridges, and corroded aerators often require proper tools. Keep water away from outlets, cabinets, and flooring. I sometimes expect a quick fix; that is not always realistic.

Conclusion

How to repair a broken faucet without tools begins with identifying the faucet type and locating the exact source of the leak. Look closely around the handle, spout, base, and visible connections to determine whether the problem is caused by a loose component or restricted water flow. Before working, close the nearby hand-operated shutoff valves by turning them firmly, then open the faucet briefly to release remaining pressure.

Next, gently hand-tighten any loose handles, caps, or fittings, taking care not to force them. If the water stream is weak or uneven, remove the aerator by hand when possible and clear away accessible debris using clean fingers or a soft cloth. Turn the water back on slowly and observe the faucet for several minutes. If dripping continues, a part feels damaged, or the shutoff valve will not operate, stop and seek proper assistance, since tools or replacement components may be necessary.

Liam

Liam

Liam is a dedicated marketing professional with a profound expertise in the industry, where he excels at highlighting the unique advantages of our core products. With a keen understanding of market trends and consumer needs, Liam frequently updates our company’s professional blog, providing......