How to Install a Faucet the Best Way for Your Home?

Time:2026-06-10 Author:Ethan
0%

When considering home improvements, upgrading your faucet can significantly enhance your kitchen or bathroom functionality. What is the best way to install a faucet? This simple yet impactful task requires knowledge and preparation. According to the American Institute of Architects, a well-functioning faucet can save households up to 10% on water bills.

Many homeowners underestimate the complexity involved. An incorrect installation can lead to leaks, costly repairs, and even damage to cabinetry. Research shows that almost 75% of DIY efforts in plumbing result in errors due to improper techniques. Understanding the best practices for installing a faucet is crucial. A reliable installation ensures safety and longevity for your household fixtures.

It's essential to gather the right tools and materials beforehand. Read the manufacturer’s instructions carefully. Consider enlisting professional help if you feel uncertain. Mistakes happen, and reflecting on them can lead to better choices in future installations. Ultimately, ensuring that your faucet is installed correctly pays off in both functionality and efficiency.

How to Install a Faucet the Best Way for Your Home?

Tools and Materials Needed for Faucet Installation

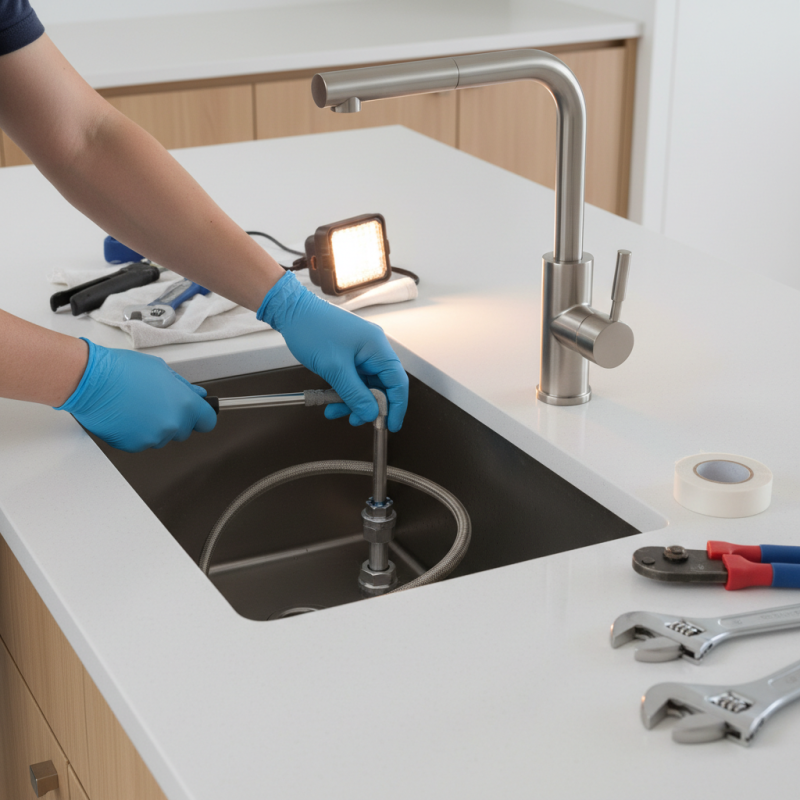
When installing a faucet, having the right tools and materials is essential. Start with a basin wrench. This tool helps tighten hard-to-reach nuts. A screwdriver and adjustable wrench are also necessary. Ensure you have a bucket to catch any water. A plumber’s tape is vital. It provides a leak-proof seal.

Gather all your materials beforehand. You will need the faucet itself, along with water supply lines. Don't forget the mounting hardware. Make sure you have silicone sealant ready. It creates a waterproof barrier. If you plan to replace the old faucet, a utility knife is handy for cutting old caulk. Check your inventory before you start. Missing tools can lead to frustration.

While the installation process seems straightforward, be aware of potential errors. Misplacing the plumber's tape can lead to leaks. Tightening nuts too much may damage the faucet. Take your time during the installation. Double-check every connection before you finish. A careful approach ensures long-lasting results. Each installation is a chance to improve your skills. Reflect on any mistakes to develop better techniques.

How to Install a Faucet the Best Way for Your Home? - Tools and Materials Needed for Faucet Installation

Item Purpose Quantity Needed Notes
Faucet Main component for water flow 1 Choose a style that matches your sink
Plumber's Tape Seal threaded connections 1 roll Prevents leaks
Adjustable Wrench Tightening nuts and fittings 1 Essential for installation
Bucket Catch any dripping water 1 Keeps the area clean
Screwdriver For mounting hardware 1 Flathead and Phillips head recommended
Hacksaw Cutting pipes if necessary 1 Ensure proper length for installation
Cleaning Cloth Wipe down surfaces A few Keep installation area tidy

Preparing Your Workspace: Safety and Organization Tips

Preparing your workspace for faucet installation is crucial. Begin by gathering all necessary tools. A wrench, basin wrench, and plumber’s tape are essential. Ensure your workspace is well-lit. Good visibility makes a difference. Take a moment to clear the area. Remove any items under the sink. This helps prevent accidents and allows free movement.

Safety should always come first. Wear gloves to protect your hands. If you’re working with older pipes, they might be corroded. Handle them with care to avoid injury. Also, consider using safety goggles. They help protect your eyes from flying debris. If you notice any leaks, address them before proceeding to installation.

Organization is key for efficiency. Label your tools and parts as you gather them. This will save time later. An organized workspace allows you to work methodically. It’s easy to overlook small details, especially when you're in a hurry. Taking an extra minute to arrange your tools can help you stay focused. Every detail matters in installation.

Step-by-Step Instructions for Removing the Old Faucet

Removing an old faucet can be a straightforward task if you follow these essential steps. Start by turning off the water supply under your sink. This prevents any unexpected leaks during the removal. Next, open the faucet to drain any remaining water. Use a wrench to disconnect the supply lines; keep a bucket handy to catch any drips.

Once the lines are detached, focus on the mounting nuts securing the faucet in place. Sometimes, these nuts are rusted or hard to reach. A stubborn nut can be frustrating. You may need penetrating oil to loosen it. If you encounter resistance, take a moment to assess your approach. Sometimes, a different angle can make a significant difference.

Tips: Make sure to wear safety goggles. Debris may fall during the removal process. If you're struggling, don't hesitate to reach out for professional help. After removing the old faucet, clean the area thoroughly. This will ensure a smooth installation for your new faucet. Always check for any leaks before finishing the job.

How to Properly Install the New Faucet with Sealing Techniques

When installing a new faucet, sealing techniques are crucial for preventing leaks. Start by gathering your tools: plumber's tape, a wrench, and a basin wrench. Before you begin, ensure the water supply is turned off. This will save you from potential water damage.

Apply plumber's tape around the threaded ends of the faucet's supply lines. This helps create a watertight seal. Carefully tighten the connections, but be cautious not to over-tighten. This can damage the fittings, leading to leaks.

After installation, test for leaks by turning the water supply back on slowly. Observe the connections closely. Small drips can indicate a need for tightening or additional sealing. Don't rush this process; take time to ensure everything is done correctly. Missing these steps can lead to frustrating water issues later.

Testing for Leaks and Ensuring Proper Functionality after Installation

After installing a faucet, checking for leaks is crucial. Start by turning on the water supply. Allow the water to flow for a minute. Observe closely for any signs of dripping around the base of the faucet. A small leak might seem minor, but over time, it can cause significant water damage. Don't ignore any leaks you see, even if they appear slight.

Next, ensure the faucet functions properly. Test both hot and cold water settings. Switch between the handles and watch for consistent water flow. If the flow is uneven, this could indicate an issue with installation. Sometimes, washers can become loose. Inspect the connections under the sink to rule out this possibility. Tightening any loose fittings is a simple task that can resolve flow issues.

It's easy to overlook these steps when you’re eager to finish. However, your diligence now prevents future problems. Missing a leak test or a functionality check can lead to costly repairs. Take the time to do it right. Your future self will appreciate the effort you put in today.

FAQS

: What tools do I need for faucet installation?

: You need a basin wrench, screwdriver, adjustable wrench, and a bucket to catch water.

Why is plumber’s tape important?

Plumber’s tape creates a leak-proof seal, preventing future water issues.

How can I avoid frustrations during installation?

Gather all materials beforehand and double-check your inventory to ensure nothing is missing.

What should I do if the mounting nuts are rusted?

Use penetrating oil to help loosen stubborn nuts, but try a different angle if you face resistance.

What is the first step to remove an old faucet?

Start by turning off the water supply under your sink to prevent leaks.

How can I ensure I don't damage the faucet during installation?

Avoid overtightening nuts and double-check each connection to ensure everything is secure.

What if I encounter leftover caulk during removal?

A utility knife can be helpful for cutting through old caulk before installing a new faucet.

How can I check for leaks after installation?

Always inspect every connection and run the faucet to ensure no water escapes.

What's a good practice when installing faucets?

Reflect on any mistakes made during installation to improve your skills for future projects.

What safety measures should I take?

Wear safety goggles to protect your eyes from falling debris while working on the faucet.

Conclusion

When exploring what is the best way to install a faucet, it is essential to begin with the right tools and materials for a smooth process. Preparing your workspace safely and keeping it organized can greatly enhance efficiency. Following a step-by-step approach, first remove the old faucet carefully, ensuring that any residual water is dealt with to avoid spills.

Next, properly install the new faucet by employing effective sealing techniques to prevent leaks. After installation, it's crucial to test for any leaks and ensure that the faucet operates correctly. This comprehensive method ensures a successful faucet installation, enhancing both the functionality and aesthetics of your home.

Ethan

Ethan

Ethan is a seasoned marketing professional with a deep expertise in our company's innovative product line. With a passion for sharing knowledge and insights, he takes the lead in regularly updating our corporate blog, where he explores industry trends, product features, and effective marketing......