2026 Best Ways to Prevent Faucet Leaks in the Future?

Time:2026-10-14 Author:Henry
0%

A dripping faucet rarely begins with drama. It starts with a faint tick under the sink, a damp cabinet corner, or a handle that feels unusually stiff. In 2026, preventing that small failure matters more than reacting to it. The U.S. Environmental Protection Agency estimates that household leaks waste nearly 1 trillion gallons of water annually across the country. Its Fix a Leak Week guidance also reports that the average leaking household can lose more than 10,000 gallons each year. Those figures make faucet maintenance a practical water-saving strategy, not merely a housekeeping task.

How to prevent faucet leaks in the future depends on several connected habits. Inspect cartridge seals, O-rings, supply lines, and aerators during routine cleaning. Watch for green corrosion around connections. Check under the cabinet after using hot water, when expansion can expose weak fittings. EPA WaterSense guidance supports efficient faucet selection, with labeled bathroom faucets using no more than 1.5 gallons per minute while maintaining useful performance. Choosing certified components can reduce stress on the fixture, although efficiency alone cannot repair poor installation.

Small checks help.

Professional plumbers often recommend shutting off the water before tightening or replacing parts. That advice sounds obvious, yet hurried repairs can damage threads or misalign washers. My own assumption that a tighter handle meant a safer faucet was wrong; excessive force can accelerate wear. No prevention plan is perfect. Water chemistry, pressure fluctuations, installation quality, and daily use still matter. This guide examines practical methods, credible maintenance intervals, and warning signs that help homeowners prevent faucet leaks before a quiet drip becomes cabinet damage, wasted water, or an avoidable repair bill.
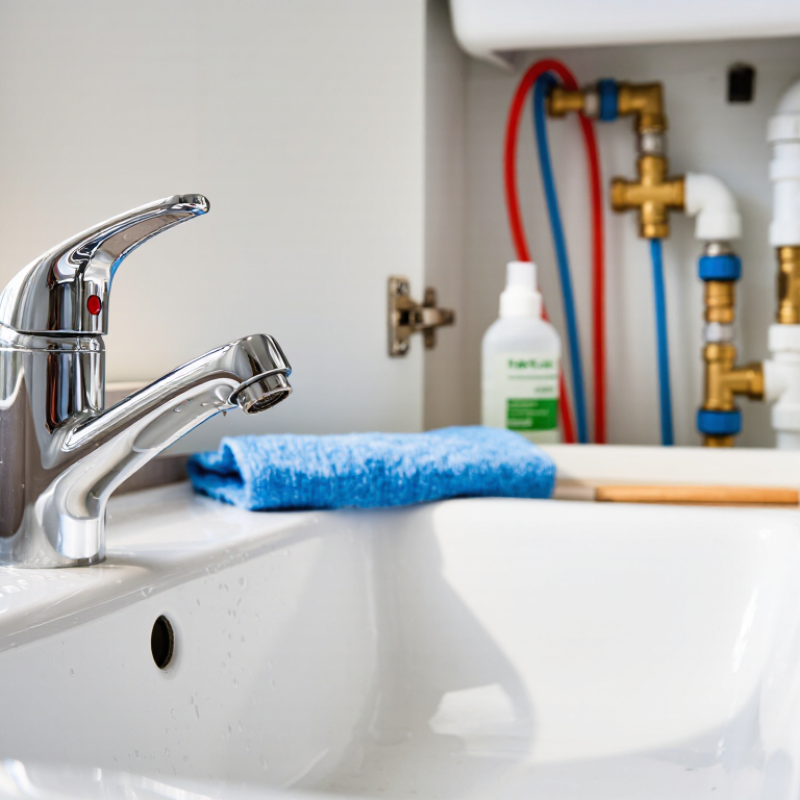
2026 Best Ways to Prevent Faucet Leaks in the Future?

Understand the Common Causes of Faucet Leaks

A dripping faucet often signals a small part failing inside the fixture. Most leaks begin with a worn washer, damaged O-ring, or weakened cartridge. These parts face friction every time the handle moves. After months of use, rubber can flatten, crack, or lose its seal.

Mineral deposits create another common problem. Hard-water scale may collect around the valve seat, aerator, or cartridge opening. The handle then feels stiff, and users may apply extra force. That pressure can damage internal components or loosen connections beneath the sink. Water pressure also matters. Excessive pressure can stress seals, supply lines, and joints, especially in older plumbing systems.

Not glamorous, but important.

During routine repairs, technicians often find leaks caused by loose fittings rather than broken faucets. Check the cabinet every few weeks for dampness, green corrosion, or a musty smell. Wipe the area completely dry before inspecting it again. Clean the aerator and moving parts gently, avoiding sharp tools that scratch sealing surfaces. Replace brittle washers and O-rings early, using the correct size.

Do not overtighten connections; this is a surprisingly common mistake. I once treated a minor drip as harmless, and the hidden moisture later damaged the cabinet base. That experience changed how I judge “small” leaks.

Even a newly installed faucet deserves a careful inspection after several days of use.

Choose Durable Faucets and Compatible Replacement Parts

Durable faucets begin with materials that tolerate daily use and changing water conditions. Solid brass or stainless-steel bodies usually resist cracking better than thin, fragile alloys. A ceramic cartridge can reduce dripping caused by worn washers. Check the faucet’s construction, warranty terms, and tested performance before buying. A heavy handle is not proof of quality.

Replacement parts must match the original faucet precisely. Record the model number, cartridge length, stem shape, thread size, and O-ring diameter. Measure twice. A nearly identical cartridge may still leak because its stem sits two millimeters too high. Choose seals made for potable water and temperatures found under the sink. Mixing parts from different designs often creates pressure problems.

During installation, close both shutoff valves and place a towel inside the cabinet. Remove mineral buildup before fitting new seals. Use thread tape only on threaded connections; compression fittings need clean, undamaged surfaces instead. Tighten by hand, then add a small turn with a wrench. Too much force can split a fitting, an easy mistake even for careful homeowners. Turn the water on slowly and inspect every joint with a dry tissue. Recheck it the next morning, because a tiny leak may appear only after the system reaches normal pressure.

2026 Best Ways to Prevent Faucet Leaks in the Future? - Choose Durable Faucets and Compatible Replacement Parts

Prevention Area Recommended Choice or Practice Relevant Technical Detail Typical Service Expectation Compatibility or Installation Check Leak-Prevention Benefit
Faucet Body These materials generally provide better resistance to impact, corrosion, and repeated temperature changes than low-strength plastic components. Often suitable for many years of residential use when installed and maintained correctly. Confirm that the body size, mounting-hole arrangement, and water-supply connections match the sink or countertop. Reduces the risk of cracks, corrosion-related pinholes, and deformation around connection points.
Valve Cartridge Ceramic discs have smooth, hard sealing surfaces and are less prone to wear from normal handle movement than many older compression-style designs. Commonly designed for long-term residential service; actual life depends on water quality and usage. Match cartridge length, diameter, stem shape, retaining method, and hot/cold orientation. Similar-looking cartridges are not always interchangeable. Helps prevent dripping from the spout and leakage around the handle.
O-Rings and Seals EPDM is commonly used for potable-water applications, while other elastomers may be selected for different temperature or chemical conditions. Inspect during cartridge or spout service and replace when flattened, cracked, brittle, or swollen. Measure the original seal or use the faucet’s technical parts diagram. The inside diameter, outside diameter, and cross-section must match. Prevents leaks at the spout base, valve stem, hose connections, and internal joints.
Supply Lines Use lines rated for the local water pressure and temperature, with corrosion-resistant connectors and intact sealing washers. Inspect periodically and replace immediately if bulging, rusting, cracking, or leaking is visible. Verify connection thread type, line length, washer condition, and hot/cold routing before tightening. Reduces the chance of sudden leaks beneath the sink and prevents stress on the faucet inlet.
Replacement Washers A washer must seal evenly against its mating surface; incorrect thickness or angle can cause continuous dripping. Replace during repair rather than reusing a compressed or hardened washer. Match outer diameter, inner diameter, thickness, material, and bevel direction. Restores proper compression and prevents leaks in compression valves and threaded joints.
Threaded Connections Some connections seal with a washer or O-ring and should not receive thread tape; tapered pipe threads may require an approved sealant. Check every serviced connection for seepage after pressurizing the system. Do not apply tape to compression threads or to fittings designed to seal with a gasket. Avoid covering the first thread when tape is appropriate. Prevents poor seating, cross-threading, and leaks caused by using an incompatible sealing method.
Water Pressure Excessive pressure increases stress on cartridges, seals, hoses, and flexible connectors. A pressure-reducing valve may be needed in high-pressure systems. Test with a pressure gauge when leaks recur without an obvious component failure. Measure static pressure and follow the limits specified for the faucet and plumbing installation. Reduces long-term stress and premature wear throughout the faucet assembly.
Water Quality Hard water can leave mineral deposits that restrict cartridge movement and damage sealing surfaces; sediment can scratch internal components. Clean aerators and inspect cartridges when flow decreases or the handle becomes difficult to operate. Choose treatment equipment based on a water-quality test rather than assuming every faucet needs the same filter. Limits abrasive particles and mineral buildup that can create paths for leaks.
Handle Operation Excessive torque can damage cartridge stems, retaining nuts, and internal ceramic discs. Investigate stiffness instead of applying more force; deposits or a worn cartridge may be the cause. Confirm that the handle adapter and stem interface fit correctly and are secured without over-tightening. Prevents mechanical damage that can lead to leaks around the handle or valve body.
Aerator Maintenance Mineral particles can obstruct the screen and increase turbulence or back pressure at the outlet. Clean as needed based on water quality and changes in flow. Replace the aerator with the same thread type, diameter, and flow rating when the screen or housing is damaged. Maintains proper flow and helps prevent pressure-related seepage at the spout outlet.
Installation Torque Over-tightening can deform washers, crack plastic nuts, damage threads, or distort the faucet base. Recheck accessible connections after the first use and during routine cabinet inspections. Use the installation instructions for torque guidance and hold the mating fitting to prevent twisting the supply line. Creates a stable seal without damaging the parts that provide the seal.
Compatibility Records Model and measurement information makes future replacement-part selection more accurate than appearance alone. Update the record whenever a cartridge, hose, washer, or aerator is replaced. Compare dimensions, thread standards, valve configuration, and installation date before ordering parts. Reduces incorrect-part installation, repeat repairs, and leaks caused by forced or improvised substitutions.
Routine Inspection Early signs include water spots, green or white deposits, dampness, handle stiffness, and intermittent dripping. Inspect at least several times per year and after plumbing work or unusually high water pressure. Dry the area first, then run hot and cold water while observing every joint and connection. Detects small leaks before they damage cabinetry, flooring, or surrounding plumbing components.

Install Faucet Components Correctly and Securely

2026 Best Ways to Prevent Faucet Leaks in the Future?

Install Faucet Components Correctly and Securely

A lasting faucet installation begins with clean, undamaged connection points. Remove old sealant, mineral deposits, and loose debris before fitting new parts. Check the cartridge, washers, O-rings, supply lines, and mounting hardware for cracks or distortion. Even a small defect can create a slow leak behind the cabinet.

Follow the manufacturer’s installation measurements, but do not rely on force. Hand-tighten threaded connections first, then use a wrench for a controlled final turn. Excessive tightening can crush a washer or damage delicate threads. Apply suitable thread sealant only where the connection requires it. PTFE tape is not appropriate for every fitting. Keep it square. A misaligned supply line can place constant stress on the valve body.

Secure the faucet firmly beneath the sink, while keeping the base level against the countertop. An uneven base may allow movement every time the handle turns. I once overlooked a slightly twisted mounting plate, and the faucet loosened within weeks. That mistake changed my installation checks. After assembly, open the water slowly and inspect every joint with a dry tissue. Look again after ten minutes. Operate both handles, check the sprayer, and examine the connections below the sink. Small drips are easier to correct before cabinet wood absorbs them.

Create a Routine Inspection and Maintenance Schedule

A routine inspection schedule can prevent a small faucet leak from becoming cabinet damage. Check every faucet once a month, even when no dripping is visible. Turn each handle slowly and watch the base, spout, and connections beneath the sink. Use a dry tissue around joints. It reveals moisture faster than your eyes.

Clean the aerator every three months because mineral buildup can increase pressure around seals. Remove it carefully, rinse the screen, and check for cracks or rust. Inspect flexible supply lines twice a year. Look for bulges, discoloration, loose fittings, or damp spots. Do not overtighten connections; excessive force can damage internal washers. Small drips matter.

I once ignored a faint tapping sound because the cabinet looked dry. A week later, the wood had swollen near the plumbing connection. That mistake changed my inspection routine. Now I open the cabinet, use a flashlight, and run the faucet for two minutes. I also check the shutoff valves without forcing them. If a valve sticks, a qualified plumber should examine it. Keep a simple maintenance record with dates, unusual sounds, and replaced parts. Review it every six months. Some leaks appear only when water is hot, so test both temperatures.

2026 Faucet Leak Prevention Maintenance Schedule

Routine inspections help identify dripping faucets, loose connections, worn seals, and clogged aerators before they develop into larger leaks. The schedule below converts common maintenance intervals into the number of planned checks per year.

Respond Quickly to Early Signs of Leakage

A faucet rarely fails without warning. Watch for a slow drip, a damp handle, or a pale mineral ring around the spout. These small signs often appear before water damages the cabinet or countertop. Respond quickly. Place a dry tissue beneath the connection, then check it after several hours. A wet mark reveals movement that casual inspection may miss.

Turn off the local shutoff valve before tightening anything. Use a cloth under the tool to protect the finish, and apply gentle pressure. Over-tightening can damage threads, seals, or the valve body. Inspect the supply lines for bulges, rust, and moisture near the fittings. Replace worn washers or O-rings with the correct size. Do not guess.

Small details matter. A faucet may still drip after a seal replacement if the cartridge is scratched or the water pressure is excessive. Clean mineral buildup with an appropriate household method, then test the faucet for a full day. Check underneath again at night. In maintenance inspections, photographs help track changes and explain problems clearly to a qualified plumber. I used to treat a single drop as harmless. That was careless. Early action is usually cheaper, but rushed repairs can create new leaks.

FAQS

What materials usually make a faucet more durable?

Solid brass or stainless steel can resist cracking during daily use. Ceramic cartridges may reduce dripping. Weight alone proves little.

How can I choose the correct replacement cartridge?

Record the model number, cartridge length, stem shape, thread size, and O-ring diameter. Measure twice. Nearly identical parts may still leak.

Why can a similar-looking replacement part fail?

Its stem may sit two millimeters too high. That small difference can prevent proper sealing and create a slow drip.

What should I do before installing faucet parts?

Close both shutoff valves and place a towel inside the cabinet. Remove mineral buildup, old sealant, and loose debris.

When should I use thread tape?

Use thread tape only on suitable threaded connections. Compression fittings need clean, undamaged surfaces instead. This distinction is easy to miss.

How tightly should faucet connections be secured?

Tighten them by hand, then add a small wrench turn. Excessive force can crush washers or split fittings.

How can I check for leaks after installation?

Open the water slowly and press a dry tissue against every joint. Check again after ten minutes and the next morning.

What early signs suggest a faucet needs attention?

Watch for slow drips, damp handles, bulging supply lines, rust, or pale mineral rings. Small marks matter.

What should I do when a faucet starts leaking?

Turn off the local valve and inspect the connection gently. Replace worn seals with the exact size. Do not guess.

Can a new seal fail to stop a leak?

Yes. A scratched cartridge, excessive pressure, or misaligned supply line may cause continued dripping. I once dismissed one drop as harmless. That was careless.

Conclusion

Preventing faucet leaks starts with understanding why they occur. Worn washers, damaged O-rings, loose connections, mineral buildup, excessive water pressure, and corrosion can all cause dripping or seepage. To learn how to prevent faucet leaks in the future, choose durable fixtures and replacement parts that match the faucet’s size, design, and water system. Compatible components reduce stress on seals and help maintain a secure connection.

Correct installation is equally important. Tighten fittings firmly without over-tightening, position seals properly, and follow the component’s installation instructions. A routine inspection and maintenance schedule can also identify small problems before they become expensive repairs. Check handles, joints, supply lines, and the area beneath the sink for moisture, rust, or unusual sounds. If you notice a slow drip, a loose handle, or water around a connection, respond quickly by tightening, cleaning, or replacing the affected part. Consistent care can extend faucet life and prevent avoidable water damage.

Henry

Henry

Henry is a dedicated marketing professional with a profound expertise in the company's offerings. With years of experience in the industry, he possesses an impressive understanding of the market dynamics and consumer behaviors that drive success. Henry is committed to sharing his insights through......